Setting up a drip irrigation system can significantly improve watering efficiency and save resources. This tutorial provides a comprehensive, step-by-step guide to help you get started.
Step 1: Plan Your System
- Assess Your Area: Identify the plants and areas to irrigate. Consider the types of plants, their water requirements, and the layout of your garden or farm.
- Measure and Map: Create a detailed sketch of the irrigation area, noting water sources, plant locations, and potential tubing paths.
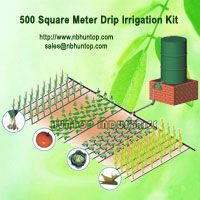
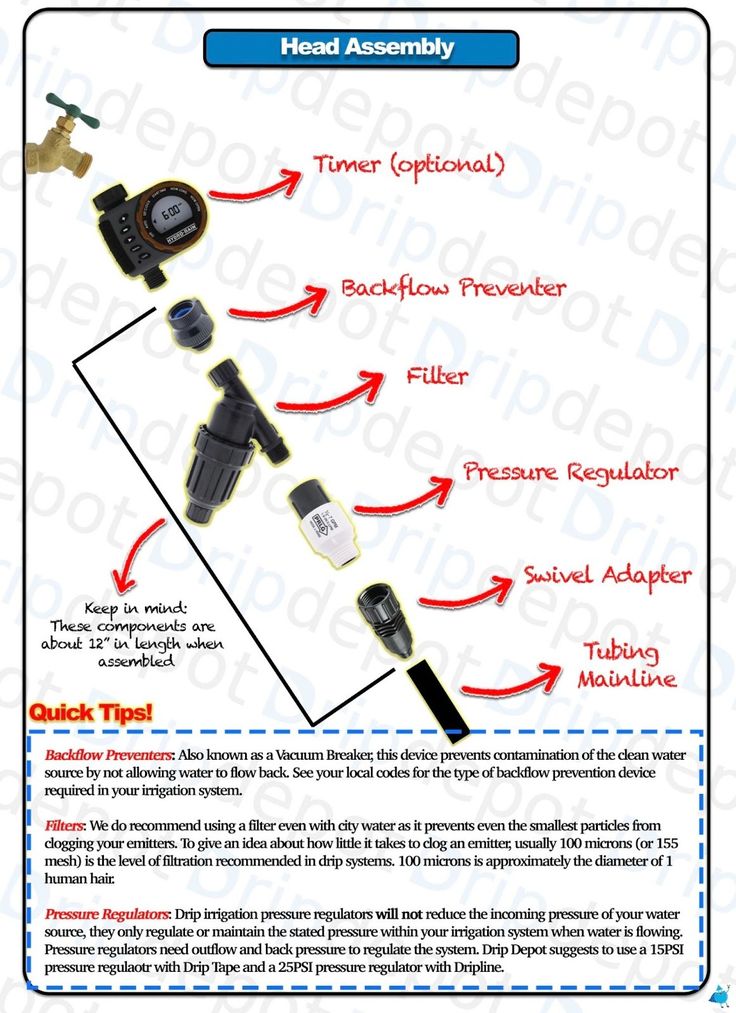
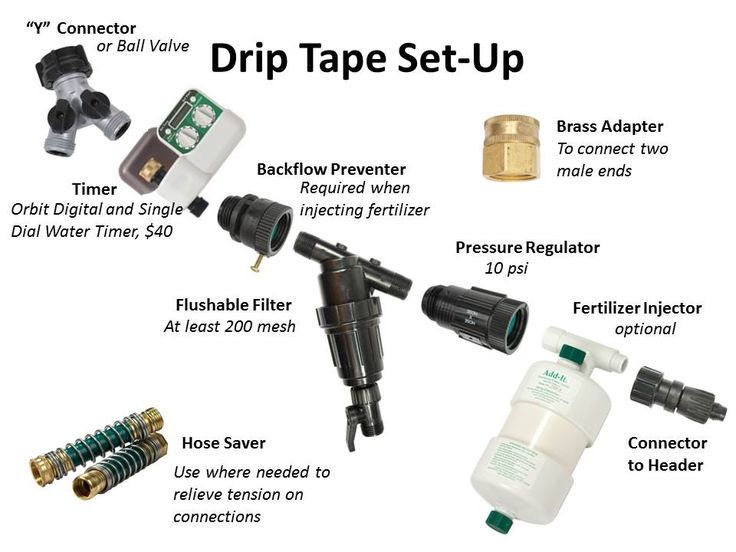
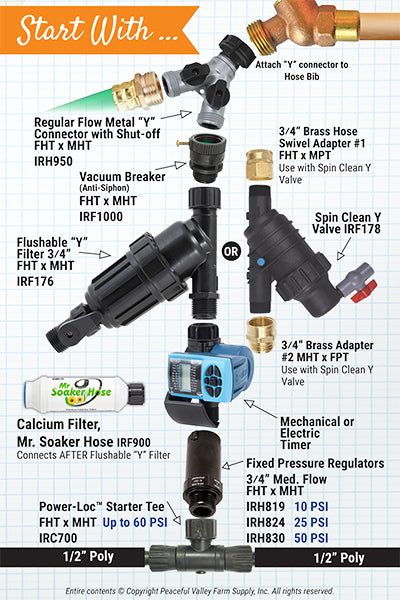
- Choose Components: Select the right materials, including tubing, emitters, filters, connectors, and timers, based on the scale and type of your project.
Step 2: Gather Materials
| Item | Purpose |
|---|---|
| Mainline Tubing | Distributes water from the source. |
| Emitters | Control water flow to plants. |
| Filter | Keeps the system free of debris. |
| Pressure Regulator | Maintains consistent water pressure. |
| Connectors | Joins tubing sections together. |
| Timers | Automates watering schedules. |
Step 3: Assemble the System
- Install the Filter and Regulator:
- Attach the filter to the water source to prevent clogs.
- Connect the pressure regulator to ensure steady flow and protect the system from damage.
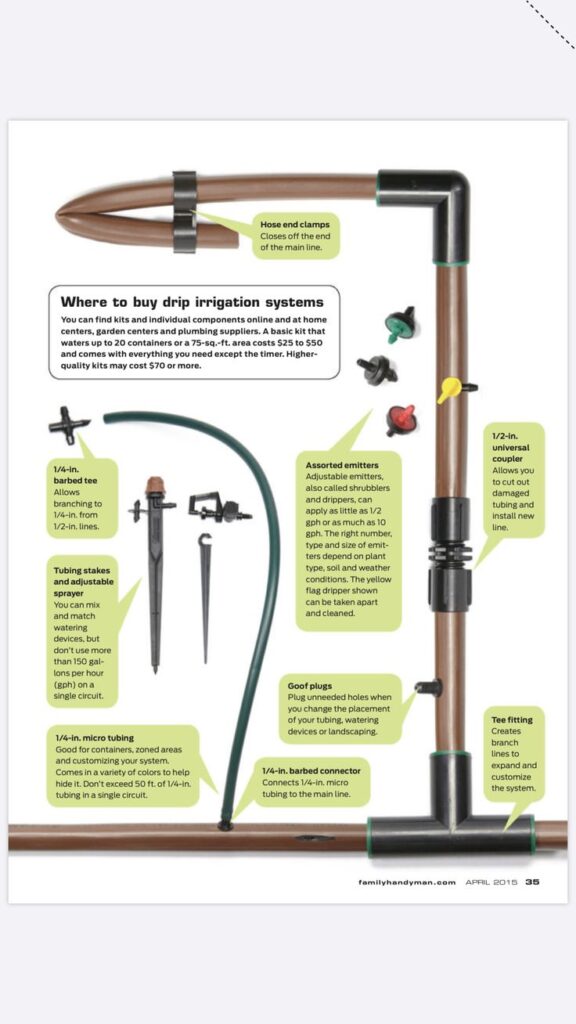
- Lay Mainline Tubing:
- Unroll tubing along the planned paths. Ensure it reaches all designated areas.
- Use stakes or clips to secure the tubing firmly in place.
- Add Emitters:
- Punch small holes in the tubing using a hole punch tool.
- Insert emitters into the holes, positioning them near the base of plants for effective watering.
- Connect Tubing Sections:
- Use connectors to join tubing sections or create branches for different zones.
- Cap the ends of the tubing to prevent water loss.
- Install Timers (Optional):
- Connect timers to automate watering schedules, saving time and ensuring consistent irrigation.
Step 4: Test the System
- Run Water: Turn on the water supply and inspect the system for leaks or uneven flow.
- Adjust Emitters: Check the water output at each emitter and make adjustments as needed.
- Fix Issues: Seal leaks with repair tape or replace faulty components.
Step 5: Maintenance and Troubleshooting
- Regular Cleaning: Clean filters and flush tubing to prevent blockages.
- Check Connections: Ensure all connections are secure and intact.
- Inspect Emitters: Replace damaged or clogged emitters promptly.
- Seasonal Adjustments: Adapt the system for weather changes, such as reducing watering during rainy seasons.
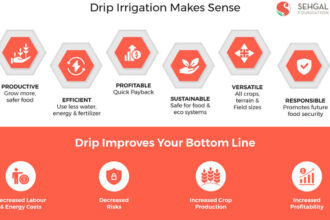
Benefits of DIY Drip Irrigation
- Water Efficiency: Reduces water waste by delivering moisture directly to plant roots.
- Cost Savings: Decreases water bills and labor costs over time.
- Improved Plant Health: Provides consistent moisture, reducing the risk of over- or under-watering.
- Environmentally Friendly: Conserves water and minimizes runoff and soil erosion.
- Flexibility: Can be customized for gardens, greenhouses, or large agricultural fields.
Common Challenges and Solutions
| Challenge | Solution |
| Clogged Emitters | Clean emitters regularly or replace them. |
| Uneven Water Flow | Use pressure regulators and ensure emitters are properly installed. |
| Leaking Connections | Secure connections with clamps or replace faulty parts. |
User Feedback
Rachel, Home Gardener: “Setting up my drip system was easier than expected. My garden looks greener and healthier than ever!”
Ahmed, Small Farm Owner: “This tutorial was spot on. It took me a weekend to install, and I’m already seeing the benefits.”
Lila, Greenhouse Operator: “I highly recommend this guide. The tips on emitter placement were especially helpful for my potted plants.”
Pro Tips for Success
- Invest in Quality Materials: Durable components ensure longevity and reduce maintenance.
- Customize for Your Needs: Tailor the system based on plant types and water requirements.
- Automate with Timers: Save time by scheduling watering sessions.
- Monitor Regularly: Keep an eye on the system to address issues early.
Drip irrigation setup is straightforward with proper planning and execution. Whether you’re a home gardener or a farmer, this sustainable solution ensures efficient watering, healthier plants, and significant resource savings.