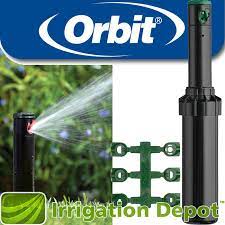
Orbit irrigation sprinklers are renowned for their innovation, reliability, and efficiency in watering landscapes. Whether you’re a homeowner or a landscaper, Orbit’s products offer features that cater to diverse irrigation needs. This guide covers the standout features, benefits, and a step-by-step setup process for Orbit irrigation sprinklers.

Key Features of Orbit Irrigation Sprinklers
Orbit sprinklers stand out due to their advanced technology and user-friendly designs. Here are some of their notable features:
1. Adjustable Spray Patterns
- Sprinklers can be set to water specific areas, reducing waste.
- Options for full-circle, half-circle, or quarter-circle coverage.
2. Smart Sprinkler Technology
- Integration with smart home systems for remote control.
- WeatherSense technology adjusts watering based on local weather.
3. Durable Construction
- Built with high-quality materials like stainless steel and UV-resistant plastics.
- Withstands various weather conditions.
4. Easy Installation
- Includes user-friendly instructions.
- Compatible with most irrigation systems.
5. Water Conservation Features
- Flow control to prevent overwatering.
- Drip irrigation compatibility for targeted watering.
Benefits of Orbit Irrigation Sprinklers
Investing in Orbit sprinklers offers several advantages:
- Efficient Water Usage: Saves water while ensuring your lawn and garden are properly hydrated.
- Cost Savings: Reduces water bills through smart watering practices.
- Healthier Lawns and Plants: Provides consistent and even watering, promoting robust growth.
- Convenience: Smart technology allows for remote control and scheduling.
- Durability: Long-lasting products reduce the need for frequent replacements.

How to Set Up Orbit Irrigation Sprinklers
Follow these steps for a seamless installation:
Step 1: Plan Your System
- Map out your lawn or garden to determine sprinkler placement.
- Identify water pressure and flow rate to ensure compatibility.
Step 2: Gather Tools and Equipment
- Orbit sprinklers and connectors.
- PVC pipes or hoses.
- Pipe cutter, tape measure, and Teflon tape.
Step 3: Install the Sprinklers
- Dig trenches for pipes if installing an underground system.
- Connect sprinklers to the main line using T-connectors.
- Adjust spray heads to desired patterns.
Step 4: Connect to the Water Source
- Attach the system to your outdoor faucet or irrigation controller.
- Use a backflow preventer for safety.
Step 5: Test the System
- Turn on the water to check for leaks or uneven coverage.
- Adjust pressure and spray patterns as needed.
Step 6: Program the Controller (if applicable)
- Set watering schedules based on your lawn’s needs.
- Use smart features for weather-based adjustments.
Maintenance Tips
Regular maintenance ensures your Orbit sprinklers perform optimally:
- Inspect for Clogs: Clean sprinkler heads periodically.
- Check for Leaks: Repair any damaged pipes or connections.
- Winterize: Drain the system before freezing temperatures.
- Update Software (for smart models): Keep controllers up-to-date.

Customer Reviews
Emily, Homeowner: “Orbit’s smart sprinklers transformed my lawn care routine. The WeatherSense feature is incredibly convenient and saves water.”
David, Landscaper: “I’ve been using Orbit sprinklers for years. They’re durable, reliable, and easy to install.”
Sophia, Gardener: “The adjustable spray patterns make it easy to water my flower beds without wasting water on pathways.”
Conclusion
Orbit irrigation sprinklers combine advanced features, water efficiency, and ease of use, making them a top choice for residential and commercial landscapes. By following the setup steps and maintenance tips provided, you can ensure optimal performance and a thriving lawn or garden. Upgrade to Orbit sprinklers today for smarter and more sustainable irrigation.


